
Winter’s beauty often comes with a price—cold feet. Whether you’re hiking through frosted trails, setting up camp in the snow, or simply enjoying a crisp morning walk, keeping your feet warm is essential for both comfort and safety. One of the most effective and affordable ways to ensure warmth is by making your own wool boot inserts. They’re simple to craft, cost-efficient, and can make a world of difference in how your feet feel on cold days outdoors.
Why Choose Wool?
Wool has long been a trusted companion for cold-weather explorers. It naturally wicks moisture away from the skin, keeping your feet dry and preventing that chilling dampness that often comes with long hikes. Unlike synthetic materials, wool continues to insulate even when wet, and it can absorb up to a third of its weight in moisture without feeling soggy.
What’s more, wool’s unique fibers trap warm air, maintaining consistent insulation while remaining breathable. As it dries, it even generates a bit of heat. On top of that, the lanolin and keratin found in wool naturally combat odor-causing bacteria—an added bonus for long days on the trail. Creating your own inserts from wool lets you take advantage of all these benefits while customizing the fit for your boots.
What You’ll Need
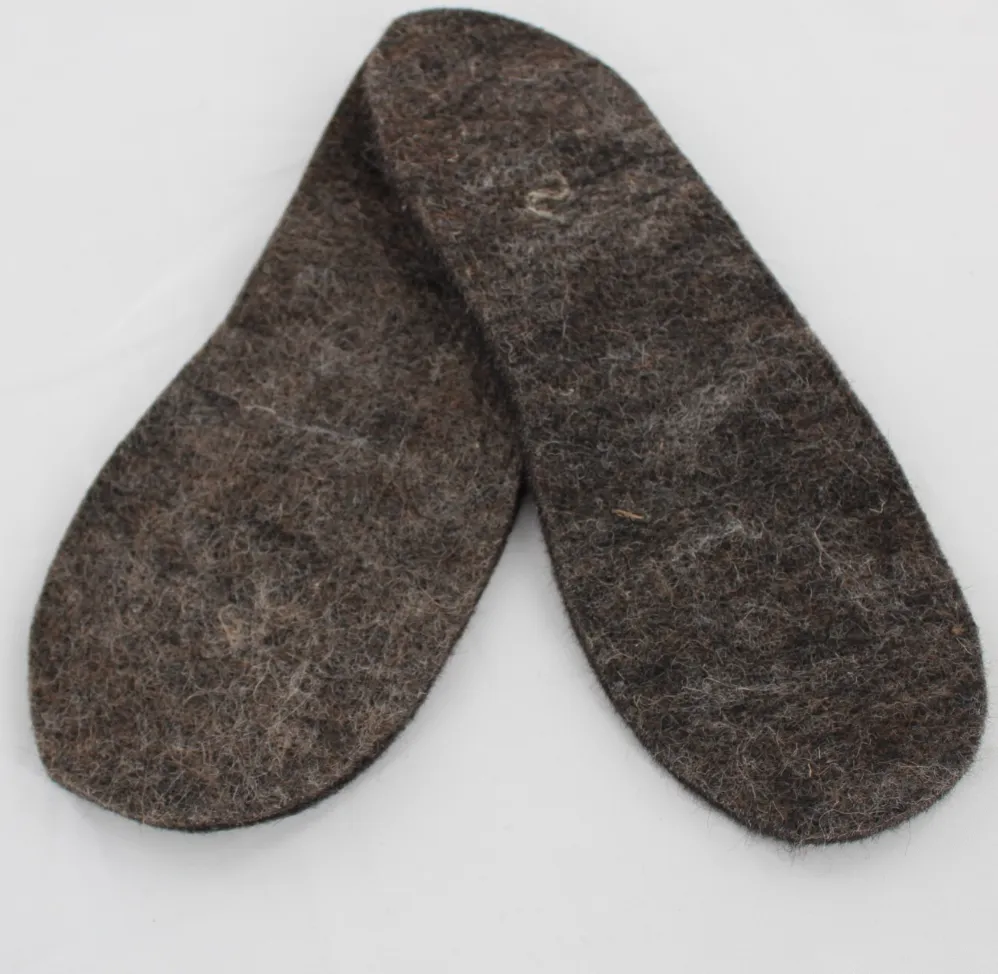
- Wool fabric (use an old wool sweater, blanket, or wool felt)
- Scissors
- Needle and durable thread
- Measuring tape or ruler
- Pen or tailor’s chalk
- Cardboard (optional, for making a template)
You don’t need special materials—many of these items are probably already in your home. Recycled wool blankets or sweaters work perfectly, but if you’re starting fresh, you can easily find wool felt at most fabric stores.
The Quick and Simple Method
- Prepare Your Wool: Lay out your wool fabric or felt on a flat surface.
- Trace the Shape: Remove the insole from your boot, place it on the wool, and trace around it. Be sure to mark both left and right inserts.
- Cut Carefully: Using sharp scissors, cut out the traced shapes.
- Insert and Test: Place your existing insole back in the boot, then add your new wool layer on top. To fit smoothly, roll the wool insert from heel to toe and unroll it inside the boot.
This straightforward version is quick and effective—ideal if you need instant warmth or a quick upgrade for your footwear.
The Deluxe Version: For Extra Warmth and Durability
If you want something a bit sturdier and more comfortable, you can make a multi-layered version that will last through many winters.
Step 1: Make a Template
Trace your boot insole or your sock-covered foot onto a piece of cardboard, then cut out the shape. This serves as your pattern for cutting the wool. Using a template ensures each insert fits neatly without bunching.
Step 2: Cut Your Wool
Smooth the wool fabric on a flat surface and trace around the cardboard pattern. Cut at least two pieces for each foot. Double layers add extra insulation, but you can use three or four layers if you’ll be spending long hours in freezing temperatures.
Step 3: Stitch the Layers
Stack the wool pieces together and sew around the edges with strong thread. Leave a small gap at the edge—this helps prevent slipping and allows minor adjustments later. If you have a sewing machine, you can use it for cleaner seams, but hand stitching works just as well.
Step 4: Optional Cushioning
For added comfort, slip a thin layer of soft foam or felt between the wool layers before stitching. Be sure that whatever you use remains breathable—avoid materials that trap moisture, as trapped vapor can freeze inside your boot and make your feet colder.
Step 5: Test and Adjust
Place the inserts inside your boots and take a short walk. If they feel too snug, trim the edges slightly. You can also remove the inserts for drying after a hike, keeping your boots fresh and moisture-free.
The Benefits You’ll Notice
Homemade wool inserts act like natural insulation, protecting your feet from the cold ground while adding a soft layer of comfort. They also help prevent heat loss through conduction, which is common when walking on frozen terrain. Best of all, they’re reusable, washable, and can be moved between different pairs of shoes or boots.
Final Thoughts: Warm Feet, Happy Trails
Making your own wool boot inserts is one of those simple do-it-yourself projects that truly pays off. With minimal effort, you can create a custom fit that keeps your feet dry, warm, and comfortable throughout your winter adventures. Whether you’re trekking through the backcountry, attending a survival course, or just enjoying a quiet walk in the snow, warm feet can turn a cold-weather challenge into a cozy experience.
So grab some wool, a pair of scissors, and a little time—you’ll thank yourself the next time the temperature drops.