
One of the best parts of summer is gathering around a crackling fire and cooking something simple yet delicious outdoors. For me, that something has always been mountain pies — warm, toasted sandwiches filled with all kinds of gooey goodness.
A Family Camping Tradition
When I was a kid, family vacations usually meant hitching up the camper and heading to a nearby campground for the weekend. My parents packed everything on Friday afternoons, and by evening, we were surrounded by nature, setting up for two days of outdoor adventures. Nights were spent playing games with new campground friends and waiting eagerly for dinner around the campfire.
Even now, when I visit home during the summer, my family still gathers around a fire in the backyard. There’s something special about the laughter, the glow of the flames, and the shared joy of cooking together. Mountain pies are always the highlight — easy to make, endlessly customizable, and satisfying for everyone.
What Exactly Are Mountain Pies?
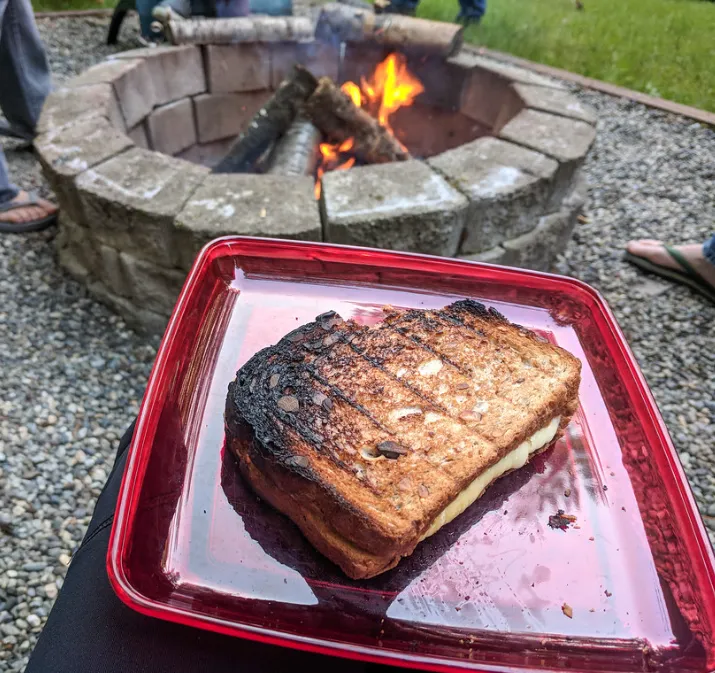
A mountain pie, sometimes called a “campfire pie,” is a toasted sandwich cooked in an iron pie maker over the fire. Think of it as a campfire version of a grilled panini. You can make them sweet or savory depending on your mood — from pizza-style sandwiches to gooey fruit desserts. They’re fun to prepare, quick to cook, and perfect for feeding a crowd.
In this recipe, I’ll show you how to make one of my favorites: pizza mountain pies.
What You’ll Need
Equipment:
- Iron pie maker (single or double)
- Firewood and a fire pit
- Cooking spray or butter
- Plates and utensils
- Lighter or matches
- Headlamp or flashlight for nighttime cooking
Ingredients:
- Sliced bread (white or wheat)
- Marinara or pizza sauce
- Shredded mozzarella cheese
- Pepperoni, sausage, or your favorite deli meat
Getting Started
First, build a hot fire with glowing coals at the base. You can cook over open flames, but coals give you more consistent heat and make it easier to control cooking time.
Lightly grease the inside of the iron pie maker with cooking spray or butter. Butter one side of each bread slice, placing one into the iron with the buttered side down. Spread a thin layer of marinara sauce over the bread, sprinkle on the cheese, and top it with your choice of meat. If you like extra sauce or cheese, go ahead — this is your pizza, after all.
Place the second slice of bread on top, buttered side facing out, and close the pie maker securely.
Cooking Your Mountain Pie
You can preheat the pie iron first to speed up cooking or start cold if you’re in no rush. Set the closed pie maker into the hot coals, keeping it level so the fillings stay put. After a few minutes, check to see if the bread is golden brown — just like making a grilled cheese. Flip the iron halfway through to toast both sides evenly.
Once the sandwich looks crisp and the cheese inside is melted, carefully open the iron and slide the pie onto a plate. Be cautious — it’ll be piping hot! Rest the iron on a fireproof surface and let it cool before passing it on to the next person.
If your pies are cooking too quickly or burning, let the iron cool for a minute or two before starting another batch. When finished, wipe off any residue once the iron has cooled completely.
Fun Flavor Variations
Pizza mountain pies are just the beginning. Once you master the method, experiment with other combinations. Here are a few crowd-pleasers:
- Ham and cheese
- Peanut butter and jelly
- Peanut butter and banana
- Dessert pies with canned apple, cherry, or berry fillings
Mountain pies are proof that simple food can be the most memorable part of any campfire evening. Whether you’re out in the woods or just relaxing in your backyard, these toasted creations bring people together — one warm, cheesy bite at a time.