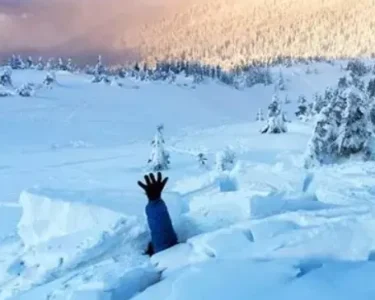

The Colorado Rockies are breathtaking in winter, but they also present some serious challenges, especially when it comes to fire starting. Whether you’re snowshoeing, hiking, or enjoying a backcountry adventure, knowing how to build a fire in the snow can be a game changer. Fire is not just for warmth; it’s vital for survival in these harsh conditions, offering heat, cooking ability, and the potential to signal rescuers. In this post, we’ll walk through the essentials of starting a fire in snowy, wet conditions and how you can overcome the common obstacles that stand in your way.
Why Fire is Crucial in Winter Survival
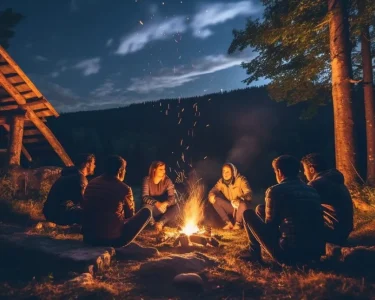
Fire is a lifeline in the winter wilderness. It does more than keep you warm—it provides the means to cook food, melt snow for drinking water, dry out wet clothing, and boost your morale when the situation feels dire. But fire can also be a beacon, signaling rescuers and letting them know you’re out there, waiting for help. It’s more than just a luxury—it’s a necessity.
In snowy conditions, starting a fire is even more important. The cold, wind, and wet materials make the task more difficult, but with the right knowledge and gear, you can create warmth and security in the wilderness.
The Challenges of Fire Starting in Snow
Building a fire in snowy conditions comes with its unique set of challenges. Here’s what you’ll be up against:
- Wet Materials: Snow makes everything damp, which makes it incredibly difficult to find dry tinder and kindling. Without dry materials, your chances of starting a fire decrease significantly.
- Cold Hands: Trying to work with cold fingers can make even the simplest tasks feel impossible, including striking a match or handling tinder.
- Oxygen Issues: Wind and snow can smother a fire quickly. If your flame doesn’t get enough oxygen, it will fizzle out, no matter how much effort you put into it.
Now that you know what you’re up against, let’s look at how to overcome these challenges and successfully start a fire in snowy conditions.
Essential Tools and Materials for Fire Starting
When heading into the snow, make sure you’re prepared with the right tools and materials. Here’s what you’ll need to have on hand:
- Reliable Fire Starter: A Bic lighter is one of the best tools you can carry. I recommend carrying at least two, as they’re lightweight, affordable, and work reliably in cold conditions. If you’re looking for something more durable, waterproof matches and a ferro rod are great alternatives.
- Waterproof Matches: These are a classic choice for starting fires in wet conditions. Keep them in a sealed container to ensure they’re always ready.
- Ferro Rods: These can spark at temperatures far lower than a standard match. While they’re effective in any weather, they require practice, so make sure you’re comfortable using one before your adventure.
Pro Tip: Upgrade Your Bic Lighter
To get the most out of your Bic lighter, consider making a few modifications. Remove the safety guard and the metal shield around the flame to allow for a larger, stronger flame. Add some bright-colored duct tape to make it easier to find in the snow and also use the tape as an emergency fire starter.
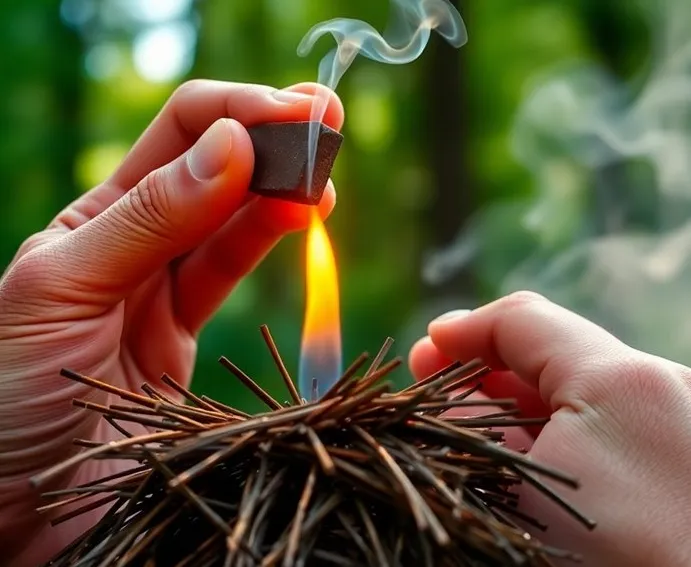
- Tinder: Your fire’s spark will need tinder to catch and grow. Good options include cotton balls with petroleum jelly, char cloth, or WetFire tinder cubes. Cotton balls burn long enough to get kindling started, while WetFire cubes work in damp or windy conditions.
Backup Fire Starters
When natural conditions make fire starting more challenging, consider bringing some fire aids like:
- Fire Paste for soaking wet wood.
- Magnesium Shavings that burn hot and ignite even damp kindling.
Pro Tip: Store your fire-starting materials in a waterproof container such as a Pelican case, so they stay dry and ready to use.
Finding and Preparing Fuel in the Snow
In snowy conditions, finding dry fuel is a skill in itself. You can’t rely on materials lying on the snow-covered ground, as they are often soaked or frozen. Instead, focus on higher, dryer branches or dead trees that aren’t touching the snow.
- Fatwood: The resin-filled core of dead pine is naturally moisture-resistant and works even when it’s wet.
- Dry, Standing Wood: Look for branches that are still standing but not covered in snow. These will usually be drier than fallen branches.
If you’re struggling to find dry wood, you can use techniques like batoning or making feather sticks to create dry kindling from wet wood.
Pro Tip: If you’re in need of dry fuel and all else fails, use your knife to split wood with a technique called batoning, which exposes the dry inner core of the wood.
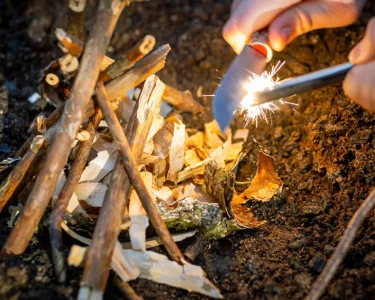
Processing Tinder and Kindling
Once you’ve gathered your tinder, you need to prepare it properly. Raw, unprocessed tinder won’t catch fire easily, so breaking it down into finer fibers is crucial.
- The Art of Processing Tinder: Use your hands, knife, or a rock to break down twigs, bark, and dry grass into thin, hair-like strands. The more surface area you expose, the easier it will be for the sparks to catch fire.
- Fluff It Up: After processing, gently pull the fibers apart to allow for better airflow. Fire needs oxygen to burn, and this process helps your tinder catch the spark more effectively.
Building a Fire Lay for Success
Once you have your tinder and kindling ready, it’s time to structure your fire. A fire lay is how you arrange your materials to get the best airflow and create a stable flame.
The Lean-To Fire Lay:
This simple and effective fire lay is perfect for snowy conditions because it provides great airflow and stability. Here’s how to build it:
- Create a Stable Base: Start with a thick log or rock to create a foundation above the snow.
- Prop Smaller Sticks Against the Backbone: Place your kindling at an angle against the base. The key here is to avoid neat stacking—let the fire breathe by leaving plenty of gaps between the sticks.
- Place Tinder Beneath: Put your processed tinder underneath the kindling, directly in the flame’s path.
Once you’ve lit your tinder, the flames will climb up the sticks, spreading and feeding on the oxygen.
Pro Tip: Keep your kindling bundled and ready nearby. Once your tinder is burning strong, gently add the kindling to ensure the fire has enough oxygen to grow.
Advanced Fire Lays: The Fire Dog and Log Cabin
For more complex fires, consider using the Fire Dog Fire Lay or the Log Cabin Fire Lay:
- Fire Dog Fire Lay: This is similar to the lean-to but with added elevation for better airflow. The structure is supported by two parallel logs, with kindling stacked on top to create a larger, more efficient fire.
- Log Cabin Fire Lay: Ideal when you have plenty of dry materials, this lay starts with a platform and stacks sticks in a square shape to create a strong, stable fire with great airflow.
Final Thoughts: Fire Starting in Snowy Conditions
Fire is essential for survival in the Colorado Rockies, especially during winter when the cold, snow, and wind are constant threats. With the right preparation and the knowledge of how to process tinder, kindling, and build a fire lay, you can increase your chances of staying warm and safe.
Don’t wait until an emergency to practice these skills—take the time now to experiment with fire starting techniques and get comfortable using your tools. A little preparation and practice can go a long way when the cold winds start howling.